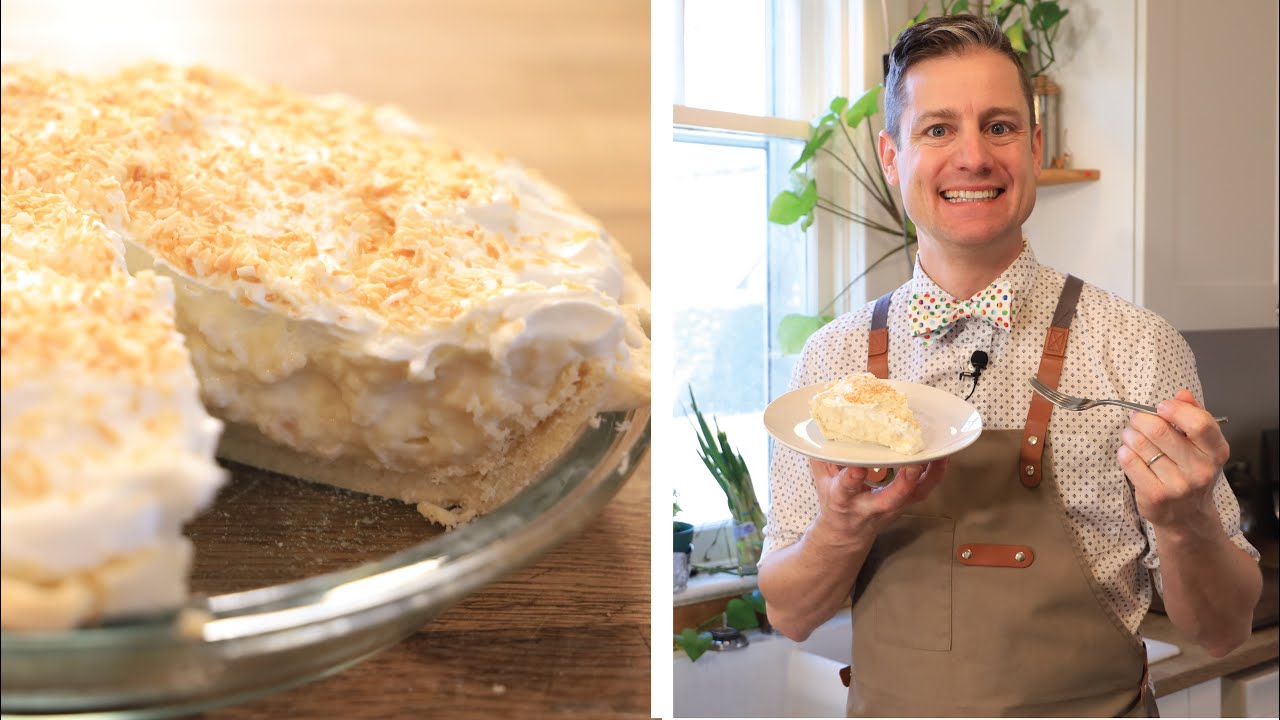
Indulge in the incredible flavor of our Gluten Free Coconut Cream Pie. A mouthwatering treat that will leave you craving for more.
Indulge in a Decadent Dairy-Free Delight!
Indulge in a slice of creamy paradise with this Gluten-Free Coconut Cream Pie recipe! This step-by-step tutorial guides you through creating a delectable coconut cream pie from scratch, perfect for those with gluten sensitivities or anyone craving a delightful dessert. From preparing the gluten-free pie pastry to crafting the velvety coconut cream filling, each step is explained to help you create a dessert that’s as beautiful as it is delicious.
This recipe is not only a crowd-pleaser but also a wonderful addition to your Easter dessert spread or any special occasion. So, gather your ingredients, preheat your oven, and let’s embark on a culinary adventure together. Get ready to savor every bite of this irresistible Gluten-Free Coconut Cream Pie — a treat that’s sure to leave you dreaming of palm trees and ocean breezes.
Indulge in Every Bite of this Heavenly Gluten-Free Coconut Cream Pie!
Hey foodies, I want to make a coconut cream pie. I have never made a coconut cream pie, but I was browsing the internet and I was like, that sounds really, really good. And I keep seeing people eating them and I’m like, this is the perfect time to have a coconut cream pie. So we want to start by preheating our oven to 350 degrees Fahrenheit or 175 degrees Celsius.
And we’re going to take a parchment paper lined baking sheet and we’re going to spread some coconut on it. Because we need to toast this coconut. And that looks like a lot of coconut. And I’m going to put that in my oven. And I’m going to set my timer for five minutes. And while that’s baking and heating, I’m going to get a pot here and I’m going to mix in.
My cream and my sugar and my gluten-free flour blend. And I’m using Frankie’s gluten-free flour blend today. And it works cup for cup. And I’m like, let’s do it. Let’s just have some fun. And some kosher salt. And then I’ve got two eggs and I like cracking my eggs in separate containers because if there’s a shell or something in there, I want to make sure.
There’s no shell and look, no shell in that one. Let’s see this one and another perfect egg. There we go. And then I’m going to grab a whisk. And I’m just going to whisk this up so that the flour doesn’t clump up on me before I put it on the heat. Okay, so this is going to go on the heat.
There we go. And I’m just going to whisk it a little bit more. And I’m going to put it on a medium heat, a medium-low heat. And I’m going to keep stirring it. And if I don’t stir it, I’m going to just basically create scrambled eggs. This way it should just thicken with the heat as the egg cooks.
This is going to take a couple of minutes. Okay, it’s been about two and a half minutes. I’m just going to pull that coconut out. You can see some of it’s already starting to brown a little bit. I’m just going to give it a light stir, just like that. And I’m going to pop it back in the oven for the other two and a half minutes. Back on stirring this.
Okay, so my coconut looks done. It’s nicely toasted. Look at that. Golden brown. So I’m just going to let that cool for just a moment. And I’m going to switch from my whisk to my spatula. Oh, it’s starting to thicken up nicely. I’ve got to keep stirring it though. And I’m turning it right down to low.
I can see a few lumps, but what I’m going to do is I’m going to whisk it just to get that smooth. And you can see just how much thicker it is. So I’m going to take it off the heat for a moment and bring it over here. I don’t want to heat up my counter too much. If anything, I’m just going to use… There, I’ll use an oven mitt.
There we go. And I’m going to pour in my vanilla. Okay, and I want to take some of this coconut and I’m going to take about three quarters of it and get it into my pot. And I want to keep the rest of it as a garnish. There we go. That’s probably pretty good. I’ll let that stay over there and cool.
Okay, and I’ll just mix this in. This is really easy so far. There we go. I’m going to put this into another container so it’s a little cooler, just like that. Oh, it smells so good. And I’m going to cover that with plastic wrap. And you want to make sure it touches the surface of the custard or the pudding so that it.
Doesn’t create a big skin on it. So I’m going to let this sit out just for like maybe 30 minutes and then I can pop it in the fridge and let it cool right down. I want to make the pie shell. So we’re going to have, I’m just going to move these so I’ve got sugar, more gluten-free flour, some salt, eggs, and I’ve got to get my butter from the fridge.
There we go. You want nice cold butter. That’s why I was keeping it in the fridge. So I’m going to start by putting my butter right into my mixer. If you don’t have a mixer, that’s okay. You can use a bowl with a spoon. I just find the mixer is a little bit quicker and easier. And I’m going to put my salt in.
And I’m going to crack my eggs. And I’ve got a container here. There’s one. And there’s two. And that’s going to go in as well. And I’m just going to mix that up just a little bit. So I’ve mixed that up. I’m going to add my flour now. And it’s always amazing to watch. I always think, oh, there’s not.
Nearly enough liquid in there. And then like magic, it just comes together. What I really like about baking with gluten-free flour is you can mix it, mix it, mix it, beat it, beat it, beat it, and it’s not going to get tough. It’s so nice not having to worry about that. And I mean, you can see already the mixture is starting to come together just while I’m talking.
And it’s amazing how that happens. I mean, look at that. I’m just going to turn it up, give it a really good beat so it’s really blended in there. And that’s it. It’s so easy. I love how easy baking with gluten-free flour, especially Frankie’s gluten-free flour, it’s just so easy to work with.
Because it takes all the guesswork out. Okay. I’m going to scrape my paddle down. Okay. I am getting a sink full of dishes. Okay. I’m going to pull that out of the way. There we go. And I’m going to scrape the spatula off.
I might use it. I might not. And let’s pull all that out onto the counter. And I’ve got some dusting flour here, again with gluten-free flour. And I’m going to add a little bit of a nice, generous dusting. It’s a little on the wet side. It’s a little bit warm today.
For me at least. There we go. Now if you find that your pastry is too soft, you can always just wrap it up in plastic wrap, pop it in the fridge for like a half hour, pull it out and it’ll be that much more set up for you. But I think this is going to be just fine. Just a little bit more flour.
And I’m going to roll it out. Oh, you can see big chunks of butter there. Oh, that looks so good. I’m going to do a nice, thick crust. I’m going to roll it to about 5 or 6 millimeters, which is just over a quarter inch. Okay. And I’ve got it. Oh, it’s stuck a little bit.
I might have had to leave it, let it set up a bit. But that’s all right. I’m scraping it out. That looks great. Now I’m going to let it. I think my pastry is a bit too soft. So I’m going to wrap it up, put it in the fridge and I’ll see you in just a moment. That feels so much better.
It just took about a half an hour in the fridge and the pastry just firmed right up. Oh, yeah, it’s a lot nicer to work with. Now I’m going to roll it out. Lift. And I’m going to add a little bit more flour. There we go. I feel like I’ve done this already once. There we go.
And again, I’m rolling this out to a nice, thick crust. I’m going to do about 4 millimeters or just under a quarter inch. There we go. I’m going to roll it up. There we go. And I grab my pie shell and roll it out. That looks beautiful. There we go.
I’ll grab a little knife. I’ll just cut the edge a little bit. And I’ve got a little bit of extra pastry left over for another project. Oh, I just smushed that. There we go. So I’ll wrap that up with my plastic wrap and I’ll keep it in the fridge and the next time I want to use it within a week,.
I’ll have a pie shell’s amount of pastry ready to go. So I’m just going to flute the edge a little bit. And I’m just taking my finger and just pushing the pastry up and then pushing another piece down nice and easy. And if you want to just do a fork on the edge and just fork it, that’s fine. I wonder how many different variations there are. Probably hundreds of different variations. But this is probably my favorite.
It’s also the easiest one that I find. It’s the quickest and it looks pretty fancy. So we want to blind bake this in a preheated oven of 350 degrees Fahrenheit or 175 degrees Celsius for about, I’m going to say 15 minutes. The blind bake you want to put in some parchment paper, not wax, parchment paper, and then you need some something to weigh that down. And this is to keep the pastry from bubbling up.
And so that’s just adding a pretend weight in there. You definitely have to have the parchment paper in there. Otherwise you’re going to have really hard beans or seeds embedded in the bottom of your pastry and you don’t want that. So I’m going to put this in my oven and we’ll put it together in a moment. Just like that, I’ve got a blind bake pie shell. It took about 15 minutes in my oven.
You’d want to keep an eye on it just when it’s starting to get golden brown on the edges. You want to make sure it is fully cooked all the way through because we’re not going to be baking it again. This is it. So you want to make sure it’s actually fully baked. But now that that’s done, I can take this. It’s only been maybe 40 minutes in total that we’ve had to wait for this.
I’m going to grab a spatula. I’m going to spread this down onto this. Oh, this looks great. I thought it would be too much, but it looks like it’s the perfect amount for a pie shell. So I’m going to just smooth this out. Look at that. I don’t even need my offset spatulas. Okay, so that is going to go into my fridge for about four hours.
It needs to set up and then we’re going to add whipped cream and we’re going to dig into it. See you in a moment. It’s been about four hours with the pie being in the fridge. I did cover it because I didn’t want that skin to form. It looks really good so far. It’s firmed right up. Now I get to put whipped cream on it. So I thought, why not whip it by hand?.
So I’ve got some sugar. I’m just going to move that pie to the other side. And then whipping cream. I assume you could use something more like Cool Whip or an artificial whipping cream, but I like the taste of real whipping cream myself. And then we’re just going to whip it. I think that looks really good. I’ve got to make sure it’s good.
Perfect. Okay, so let’s put this together. I’m just going to drop this right on the pie. Oh my goodness, that’s a lot of whipped cream. But the recipe called for a cup and I’m like, sure, let’s use a cup of whipped cream. Okay, I’m going to use a small offset. Oh yeah, it’s spreading it nicely. That looks really nice.
Okay, so let me grab some of this toasted coconut from when we did that at the beginning. I’m just going to do this. I’m going to sprinkle it right on top. Oh, look at that. That looks beautiful. I don’t think I need all of this. I think that looks good enough to eat. I think I’m going to just cut into it and just enjoy. So I’ve got my lifter,.
I’ve got a fork, and I’ve got a plate. I’m not going to eat the whole pie yet. Okay, so I’m going to slice it. Nice firm crust. Okay, let’s get a nice slice out. There we go. The moment of truth. That looks great. I mean, unfortunately, you can’t see any of the coconut.
Cream because the whipped cream just slid down as I pulled it out. Maybe I can show off some of that. There it is. Beautiful looking. Oh, that smells so good. Mmm. It’s light in airy. It’s got those nice coconut-y, toasty notes.
Mmm. I don’t know why I haven’t had this yet before in my life. I mean, I’m in my 40s and I’m like, “Why have I not had coconut cream pie yet?” This is so good. If you’re looking for the full recipe, you can visit glutenfreeguy.ca. You can also follow me on Facebook, Instagram, Pinterest, and LinkedIn.
And stay tuned for the next episode that I’m coming out with, and it’s going to be a carrot cake breakfast cookie. Thanks for watching. Mmm. That’s a really good cake. Mmm? Pie. Did I say cake the whole time? No.
Oh, yeah! Old-fashioned coconut cream pie ending.