Experience the joy of gluten free scones that are super easy to make, flaky and absolutely delightful. Indulge in a delicious treat today!
Irresistible Gluten Free Scones for Every Occasion
Enjoy these super flaky and really tasty gluten free scones made from scratch. Follow along as the glutenfreeguy demonstrates how to create traditional gluten free English scones that are so delicious, you’ll never want to buy store-bought ones again.
From rolling out the dough to inspecting the finished product, this recipe guide covers everything you need to know to bake the perfect scones. Learn about key aspects to look for in a finished scone and get ready to sink your teeth into these mouthwatering treats.
Gluten-Free Scones: A Flaky Delight for Every Palate!
Hey foodies, let’s make some scones. Did you know that you can pronounce it scon or scone? Both are perfectly acceptable ways of pronouncing them. In Scotland and Northern England, people typically pronounce it as a scon, and in the south of England it’s typically pronounced scone. The origins of where this recipe originated from are a bit hazy. I’ve read that they are from England, Scotland and Ireland, and there is a poem.
That briefly makes a reference to them as early as 1513. But wherever they originated from, scones are to the British what bagels are to New Yorkers. Wherever they’re from, in whichever way you pronounce them, we can all agree that they are tasty little pieces of delight, typically served with jam or preserves and clotted cream. I’m excited to make these today, so let’s roll up our.
Sleeves and get right to it. And we want to start by mixing in our butter, and the butter that I have is really cold, so I’m going to grab it from the fridge. And it’s important to have nice, cold butter, and I’ve already cubed this, and it just helps make it break down a little bit faster. And then I’m going to put in my flour, and my baking powder, and my sugar, and my salt.
And then I’m just going to use a wooden spoon, and I’m just going to mix it up. Okay, and before I go to the next step for the flour, oh, I forgot a bowl. There we go. I’m going to crack an egg. And the reason I’m cracking an egg in a bowl is just to make sure that the egg hasn’t turned, and there’s no shells, and it looks good. And that’s going to go right into my milk, and I’m going to whisk that.
Up. I’m using a whole milk today, so it’s 3%. But you can use two, you can use one. I just find there’s a little bit more fat and body to the whole milk when I’m baking scones. Or scones. Okay, so now I’m going to dig in with my fingers, and I’m just going to rub the butter between my fingers lightly. I don’t want to really melt the butter too much, but I’m just looking to get.
This crumbled down a little bit. Because essentially we’re making a light pastry. It’s also kind of fun getting your fingers in the flour. That looks pretty good, and you can see there’s just little tiny pea size, maybe even smaller pieces of butter in there, and that’s exactly what you’re looking for. This is only taking me 60 seconds or so, it doesn’t take long at all. So now I want to pour almost all of this.
In there. I want to retain about two tablespoons, and that’s for a little bit later. And I’m just going to mix this up with my spoon. And this should be a pretty dry mixture. Yeah, you can see it’s really absorbing the flour. Yeah, that looks pretty good. Okay, and I’m going to use my scraper or my spatula, just clean off my wooden spoon. There we go. So I’m going to take some dusting flour,.
And all of the flour that I’m using is gluten-free. I’m using Frankie’s gluten-free all-purpose flour. And then that goes there. There we go. And I want to make sure I’m well floured That looks good so far. Okay, I thought I needed the rolling pin, but I don’t think I do. I’m just rolling it out to, I’m going to make it a little bit thicker. That’s better.
So I’m rolling it out to about an inch and a half or four centimeters in diameter, or sorry, thickness. And then I’ve got a three inch or almost eight centimeter cutter here. And I’m going to just dip. Oh, that looks beautiful. I’m going to dip that in my flour again. Now I’m going to do another one. And you have to dip every time.
And try not to shake too much of the flour off because that’s what’s going to keep it from sticking. And look, you’ve got all kinds of depth there. And there’s a fourth one. So I’m going to grab a parchment paper lined baking sheet, and I’m just going to set these right on here. Little pockets of goodness.
So now I’m going to take my pastry brush with the left of the paper, my pastry brush with leftover milk and egg mixture. And I just want to brush the tops. I don’t want to brush the sides. I want to make sure that not much gets down the sides. Just want to get a nice finished top. Now, obviously, if you used a slightly smaller cutter, you would get more biscuits out of this. But I like a big tea biscuit.
There we go. And then I take a little bit of sugar and just sprinkle the tops. This is optional. So this is going to go into a preheated oven of 425 degrees Fahrenheit or 220 degrees Celsius for about 18 to 20 minutes or until they’re golden brown. See you in a moment. These look amazing. I can’t get over how wonderful they are. They, I mean, they puffed right up.
They look light and fluffy and they smell really good. I do have a confession. And I say this every time. So these took 15 minutes in my oven. I said 18 to you. And I always say every oven is different. And you never know just when they’re going to be done. So you need to keep an eye on them. And I set my timer for 18 minutes. And I was like, it’s smelling really well done. Maybe it’s something burning on the bottom of the oven. And no, I.
Burnt the first batch of these. So I ended up having to do a second batch the exact same way off camera. And this is what came out of them. And they look exactly the same, just less scorched. So anyway, I wanted to look at this and like, you can see like nice and fluffy, airy, a nice little tap, which is great. They don’t feel too dense, which is really nice. They’re meant to be crumbly. So I’m excited just to sink my teeth into.
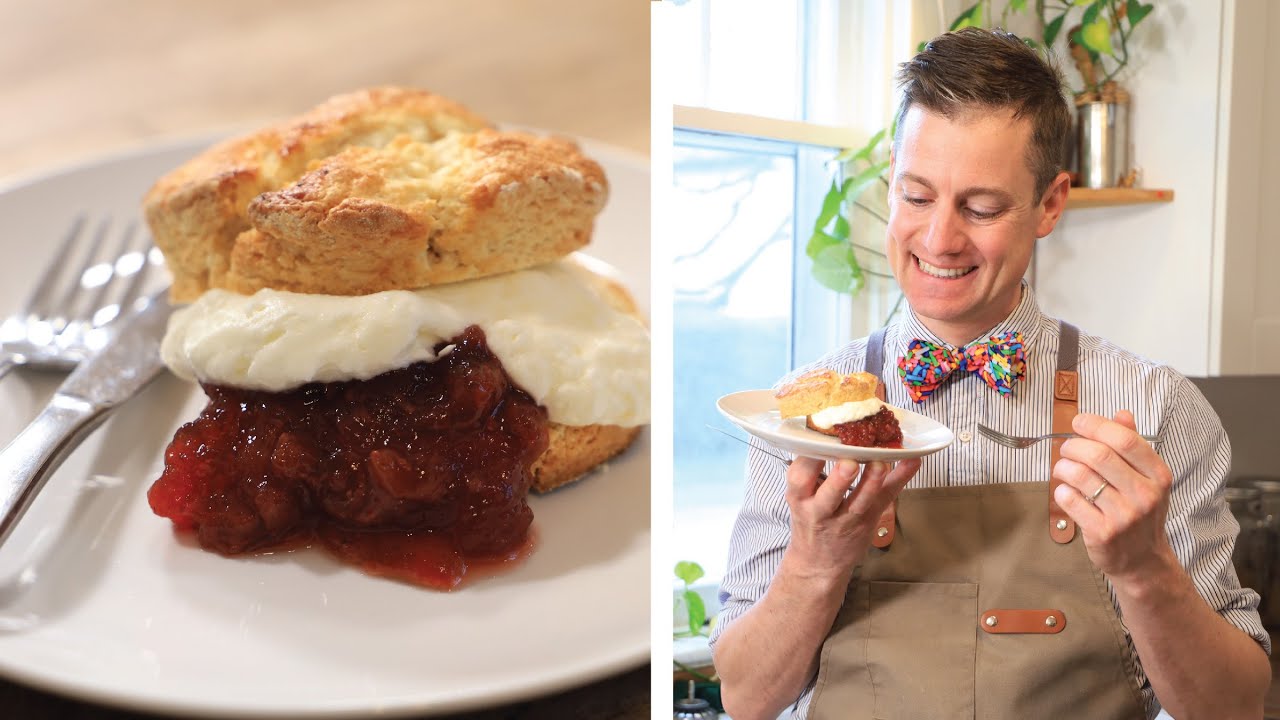
Them. You serve these warm with some clotted cream or whipped cream and some compote like a berry compote or a jam or a jelly. And really the biggest question that you’re faced with is, is it cream first and then jelly? Or is it jelly first and then cream? So I’m going to just grab my plate. That one is speaking to me. So I’m going to slice it in half. And oh, look at that. It’s just crumbling and breaking apart exactly how.
You want it to. Oh, that smells so good. Okay. And I’ve got some cream here and some jam. I’m just going to put that over there. Let’s see. I’m going to do jam first on this one. That looks great. And I’m going to put some cream on this one first. And then finish that with cream and then I’ll put the jam on this one. Oh my goodness. That looks good enough to eat. I’m.
Just going to dig in and let’s see how it goes. I’m going to try the one with the cream first and I’ll see if there’s a difference. Mm. Wow. That’s so flaky and light. Mm. Mm. This is going with my lunch, I think. Mm-hmm. Okay. I tried the cream with the berry second. That was good. I’m wondering if the berry with the cream on top is going to be any different.
Mm-hmm. I’m definitely a berry or jam first and then cream guy. Mm. What I like about it is that separation because the cream can be a little bit wet so it can actually soak in, whereas the jelly or the jam creates a bit of a barrier with the with that. Wow. These are unbelievable. If you’re looking for the full recipe, you can visit me at glutenfreeguy.ca. You can also follow me on Facebook,.
Pinterest, LinkedIn, and Instagram. Thanks for watching. Mm. Mm.