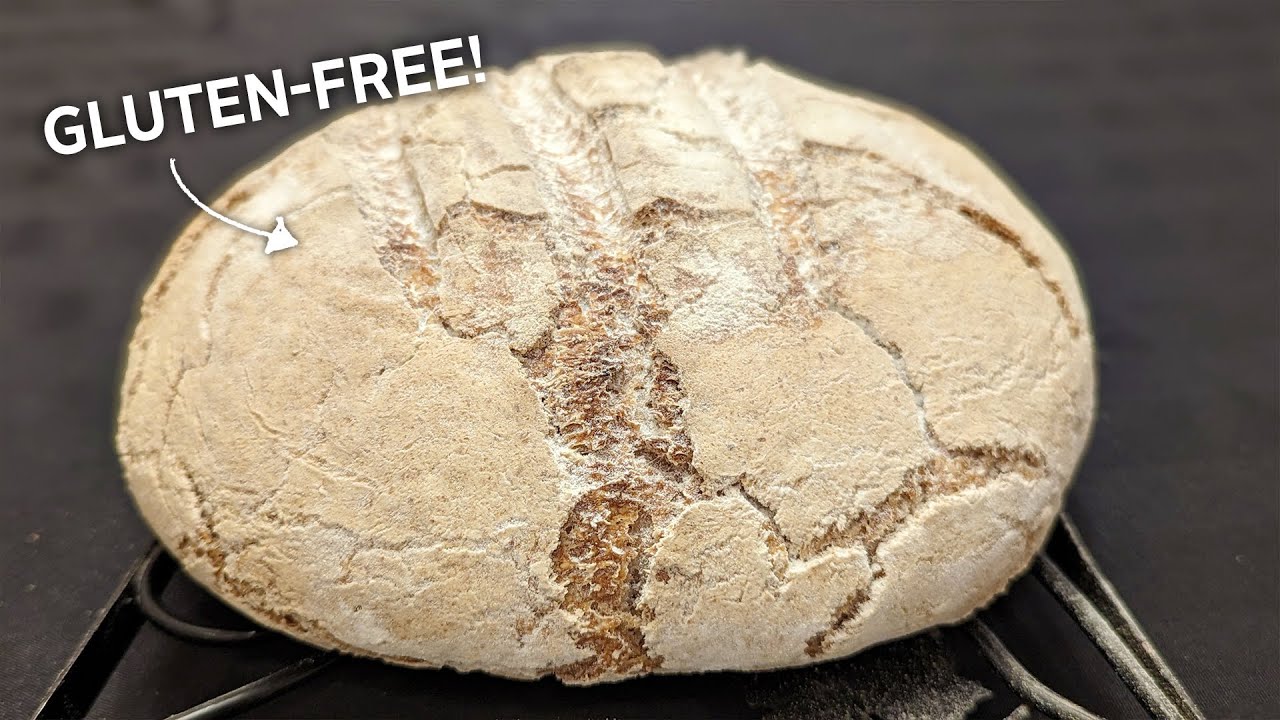
En este video aprenderás a hacer un delicioso pan sin gluten rústico y artesanal. Con solo unos pocos ingredientes y unas horas de preparación, podrás disfrutar del sabor del pan integral y de centeno sin gluten. Sigue paso a paso las indicaciones y disfruta de un pan casero y saludable
Wholesome Delights: Indulge in Rustic, Artisan, Gluten-Free Bread
Today we are going to make a “Rustic/Artisan” Gluten Free Bread – YES – rustic and artisan and Gluten Free!! For all those gluten intolerant people who miss that taste of whole wheat & rye combo bread, this gluten free bread now is the answer. It is very easy to make – only a few ingredients and is ready in a few hours. Enjoy!!
Gluten Free Bread: [link]
Gluten Free Pizza: [link]
Gluten free Foccacia: [link]
Bread lame: [link]
Banneton bread-proofing basket: [link]
Caputo Fioreglut Gluten Free Flour: [link]
Cambro proofing container: [link]
Lagostina Tuscan Collection Orange Oval Casserole Dish / Dutch Oven, 5 Quarts (affiliate links) –
- Canada: [link]
- USA: [link] (similar)
Yeast –
- Canada: [link]
- US: [link]
Ivo’s Gluten Free “Rustic-Artisan” bread Ingredients
- 500 grams (1.1 lbs.) Caputo Fioreglut flour (this particular flour is key – or one equivalent)
- 125 grams (4 ½ oz) Buckwheat Flour
- 7 grams (1 ½ TSP) instant or active dry yeast
- 12 grams (1 ½ TSP salt)
- 450 Grams (16 oz.) warm water (approximately 80 degree F)
- 17 grams (1 TBSP + 1 TSP) Olive Oil or Extra Virgin Olive oil
- More gluten free flour for dusting (can be any gluten free flour)
Process
- In a bowl, add the Caputo Fioreglut flour, the Buckwheat flour, and the yeast – mix. Then add the salt and mix again.
- Add the warm water and the olive oil and mix until all the flour and water are incorporated.
- Continue to work the dough and squeeze it from top to bottom and side to side, until it forms a smooth and consistent dough. (typically takes around 3 minutes)
- Cover and let rest for 10 minutes.
- In a bread banneton (or a bowl) sprinkle any gluten free flour all around the inside of the banneton so that it is completely covered with a thin layer of flour (if using a bowl, you may need to use olive oil instead)
- Take your dough and work it into a round shape (like a big ball) and place it in your banneton. Sprinkle a bit of gluten free flour on top of the dough and cover. Let rest for 3 hours (or up to 4 hours in a colder environment)
- At the 2 ½ hour mark, place an empty Dutch oven (or any large enough oven container), with its lid on, into your oven and preheat at 450 degrees F for 30 minutes
- Then, carefully place the dough into the pre-heated Dutch oven, put lid on and bake in 450-degree F oven for 30 minutes.
- Remove lid and bake for 10 more minutes
- Then, change oven setting to broil, and broil for 5 minutes
- Remove from oven, let rest/cool, for 1 hour or more (absolute minimum rest of 30 minutes)
- Enjoy
My Kitchen Gear
Here are a few things I mentioned in the video. Please shop and support your local shops! If you cannot find them there, here are some links to help out.
“My Bread Book” by Jim Lahey
- USA: [link]
- Canada: [link]
Lagostina Tuscan Collection Orange Oval Casserole Dish / Dutch Oven, 5 Quarts
- Canada: [link]
- USA: [link] (similar)
We are a participant in the Amazon Services LLC Associates Program, an affiliate advertising program designed to provide a means for us to earn fees by linking to Amazon.com and affiliated sites. The prices are not higher, this just makes it easier for you to find the product. Hope these links help. Thank you!
Transcript: Rustic, Artisan, Gluten Free Bread
Hello everyone, my name is Ivo and welcome to Cooking with the Coias. So glad you could join me folks, because if you know someone who is gluten intolerant or perhaps you’re gluten intolerant yourself, today folks, we are going to make an amazing rustic, artisan gluten free.
Bread. Yes, rustic artisan gluten free bread. A bread that will remind you of the bread you used to have that was made with whole wheat, uh, rye. One of those rustic farmer kind of breads. We’re going to do it with gluten free.
And in case you haven’t seen it, we already have an episode on an amazing gluten free bread, amazing focaccia, gluten free, and also an amazing gluten free pizza. I’ll put the links in the description for you for those three videos. But today, folks, it’s all.
About rustic artisan bread. Let’s get started right now. So our first ingredient folks right here I have 500g of flour, which is about 1.1 pounds, but not any flour. This is the Caputo Gluten free Fury gluten flour. Now one of the ingredients is.
Gluten free wheat starch. Yes, Caputo has figured out a way to take the gluten out of the wheat starch. So this gluten free flour is the key right here to starting a good gluten free bread. Okay, to that, here comes.
Our rustic ingredient right here. Folks, this is buckwheat. Now don’t be surprised by the name okay? We have 125g which is 4.5oz of buckwheat flour. Now it says buckwheat. It’s got the name wheat in there, but there’s no wheat in this at all.
This is 100% gluten free. Buckwheat flour is 100% gluten free. It’s not even a grain. It’s a seed that kind of looks like a grain. Um, and they come up with the name of buckwheat. But this, folks, is going to give.
Us that rustic artisan flavor that you miss with the rye in the whole wheat. So that’s a key ingredient, 100% gluten free. Um, and now we’re going to add our yeast. You could use instant yeast or active dry yeast.
So here is uh, one and a half teaspoons which is seven grams of yeast. So we’re going to add our yeast. Let’s just mix those ingredients together the two flours and the yeast. Okay. And now we’re going to add our salt.
So what I have here is I have one and a half teaspoons of salt which is 12g. So I’m going to add the salt. Now we could add the salt after uh if we’re concerned about interfering with the yeast. But we’re going to be okay.
We’ve got enough flour in there uh, that it’s not going to have an impact. So now that our salt is in, we’re going to add our water. Here I have 500g, which is about 1.1 pounds of warm water. You want about 80 degree water.
Temperature nice and warm. And the last thing we’re going to add right now is about 17g. And this is one tablespoon plus one teaspoon of I’m using extra virgin olive oil. But you could use regular olive oil.
As well. Okay. So that’s one tablespoon plus one teaspoon of olive oil which is 17g. So now quite simply we just mix all these ingredients together. Okay let’s take your time. We’re going to get our.
Hands in there at some point. But right now we’re going to start off with the spatula and just mixing these ingredients together. Now the buckwheat absorbs more water than the fiery gloop does. As you can see our our dough is developing and is.
Somewhat firm. Okay, so now I’m going to get in there with my hands and we’re going to work this dough. Okay? Now, it’s not going to come together like the dough that you’re used to making because there’s no gluten in.
Here. So you just kind of. Incorporate it. You could use the pincer method by squeezing like this. Squeeze squeeze, squeeze and get all those ingredients incorporated together. So turn it over squeeze.
So the whole key here is you want a unified and consistent dough. You don’t want any lumps or you want a nice smooth dough. So don’t be afraid to work. It keeps. This method works actually very well where you just pinch it and squeeze.
It. You can see it’s coming nice and smooth already compared to what we started with. Okay. Now, of course, you know what I’m going to say when you think you’ve mixed enough, mix a little more.
Can’t go wrong. Right, folks? Okay, so I am mixing a little more here. It’s nice and smooth, I can tell. I like the feel of it. So we’re good. Okay. Yes yes yes it is going to stick to your.
Hands. Okay. So we take that off our hands. Okay. Here we go. And now, quite simply, it needs a little rest. We’ve just worked it. So we are now just going to.
Let this sit and rest for ten minutes. So let’s just cover it up. Give it a ten minute little rest, and we’ll come right back at you. Now that our ten minutes are up. Let’s get our pundit, our bonnet. Owen. Ready. If you don’t have a bonnet tone.
Um, a simple bull will do. Okay, but I highly recommend getting a bonnet, Owen, because they are fantastic for proofing and making bread. And they are not expensive. So what I’m doing here is I’m using some.
Generic gluten free flour, and I’m aligning my bonnet tone with it. Um, because we’re going to put our dough in here and we don’t want it to stick. So and I said I’m using generic gluten free flour. That’s because the fury glute,.
Uh, is pricier than your other gluten free flours. Um, so rather than using that, I save that for my bread, my pizzas, my focaccia. Uh, and I just use the generic, less expensive gluten free flour.
For this purpose. Okay, that’s aligned pretty good. So let’s shift back to our dough and see how it’s doing. Ten minute little rest. Okay. We are going to take it out. Now a little bit of olive oil.
In this case goes a long way. I’m even going to put a little bit on my calendar here. Olive oil is your friend when it comes to, uh, the gluten free. Okay. In fact, you can put olive oil on your hands when you’re working it. And I think I’m going to do exactly.
That, folks. A little bit of olive oil on the hands. And you want to take this dough now and shape it. Um, again, it’s gluten free. There’s no gluten in here, so you can’t really work it. You just basically want to shape it.
Into a big meatball. Uh, the nice big round ball. All right. I think that’s that’s pretty good right there, folks. Okay, so now we’re just going to place it in our panettone.
And a little bit of gluten free flour on top. And now folks we just need to wait. This is going to take anywhere from 3 to 4 hours to rise. So once it doubles in size it’s ready to cook. Typically 3 to 4 hours.
It’s 70 degrees in my house right now, so chances are it’ll be closer to the three hour mark. Uh, and that’s what we’re going to fire up our oven. So here we are, folks. It’s been 2.5 hours, and I can tell by the little bump here that our dough is doing just fine.
And. Oh, yes, it is. Look at that. If you remember how much we had, it has filled this panettone up very, very nicely. So you know what that means. It will definitely be ready by the three hour mark, just as I figured. So what that means.
Is we’re going to preheat the oven. I have a Dutch oven here. I’m going to put the Dutch oven and the lid together into my oven. And we are going to preheat the oven to 450 degrees. Fahrenheit. So let’s move.
That up to 450. There we go. We’re going to let this preheat for a half an hour. And by then, our gluten free dough will be 100% ready to go in the oven and start baking. Our 30 minutes have now passed, so it’s been a total of three.
Hours for our bread dough. And it is beautiful. It’s filled this very, very nicely. Okay, let’s get our Dutch oven out of the oven. Time for the oven mitts. Mitts, folks. Okay. Piping hot.
Just like it should be. All right, so I’m going to gently place this dough into this hot oven. Be careful with this part. I’m going to tilt it over and slowly put it in. Oh, boy. Look at that.
Oh, okay. Now, with a bread lame. I’m just going to cut. I’m going to score the top one, two, three lines. That’s all I’m going to do. That’s going to help the bread rise as.
It’s cooking. Okay. Oven mitts back on. Now the lid goes back on and we’re going to put this back into the oven for 30 minutes. Okay. In the oven it goes. And we’re going to cook it for 30 minutes with the lid on.
Then we’re going to take the lid off and continue cooking. But let’s give it its 30 minutes with our 30 minute timer now up. It’s time to take the lid off. Let’s take a look here and see how we’re doing. Oh boy. It’s looking good.
Looking good folks. Okay, back in it goes. Lid off. Ten minutes and we’re still going to cook it after the ten, but we’re going to switch over to broil so that we can darken up the top of that loaf. So start the timer.
Ten minutes lid off. Our ten minutes have passed. Time to switch over to broil. We’re going to broil so that we can. Oh, I got to remove my pizza stone. Or them or the broiling won’t do any good.
Uh, let’s remove some of this flour from the top. Just brush it off a bit so that we can get a little more color to our beautiful gluten free bread, folks. Okay, there we have it. So back in it goes. We’re going to broil for five.
Minutes and see how we’re doing. We want a little bit of color on the top of that bread. It’s going to be perfect. Time to take a peek. Folks, five minutes is up. And there we got a little bit of darkening on the top there. I think you know what.
We’re going to leave it just that that right there folks, because I think we have got a winner right here. Let’s turn that off and take a better look at this loaf of bread. Oh yeah. We got some nice color here, that little bit of flour. So we’re just going to remove that.
We got beer. Whoops. We got clean. We have beautiful color here on the top folks. Very very very nice. I just remove some of that excess flour? Oh, look at this. Now remember, this is gluten free,.
Folks. This is 100% gluten free. And look at the bread that we have there. My goodness. Uh, take a look at that. Isn’t that nice? There’s the three marks that I put.
In, and let’s take a peek at the bottom. The bottom looks golden. Folks, look at that. Golden brown. Beautiful, beautiful color on the bottom. All right, we’re going to let this now rest. Put it over here.
So over here we go. We’re going to let this now rest. Uh, as much as I want to cut into it. We’re going to let it rest for at least 30 minutes before we do the taste test, folks. But isn’t that a beautiful, beautiful loaf of bread right there? Gluten free folks.
Artisan style. Gluten free. Nothing on the bottom. And I’m going to let it cool on this rack so it doesn’t sweat. If you don’t have a cooling rack, then a wooden cutting board is fine to put it on and let it cool, but it’s still it’s still developing flavors and still.
Cooking. So we’re going to let that sit for 30 minutes and then let’s taste test. My favorite part it’s been a half hour. And if you can wait longer than a half hour please do folks. But we need to get into the taste test. But they can look at that.
Bread right there. 100% gluten free. You gotta love it. Now if your bread does not turn out like this, if you didn’t use the Caputo Gluten free Fiore Gluten flour, that’s why. Okay, that flour is one of the keys. But if you can find the flour that’s.
Similar to the Caputo Fiore, glue it. By all means use it. But if it doesn’t turn out, that’s why. So let’s give let’s cut it this way right across our three lines. We’re going to go right up the middle. Nice crust already I can tell. Oh I didn’t cut. Oh it looks so.
Good inside. Folks. Look at this. Nice air pockets. We got a nice crust here. We’re going to take a closer look at this bread. That’s for sure. Oh my goodness. This bread, folks,.
Looks amazing. Let’s take a closer look. How is that? You can see the crust. You can see the air pockets. And you have to remember this is gluten free bread. Bread, folks. No more of that dull gluten.
Free bread that you buy at the store. And this one is your rustic artisan style. Oh, boy, I can’t wait to take a slice of this. Let’s do that right now. Yes, I am itching to get into this, but let’s take one quick look at the bottom. I want to show you the bottom up.
Close, nice and golden. And then of course, our top. We darkened it up nicely. When we use that broiler. So let me make a slice here. I’m going to cut one. Nice slice. Oh, wow. Wow.
Oh. Are you kidding me, folks? Nice crust, nice crumb. It’s still steaming, actually. Again, if you could wait longer, please do. All right, let’s give it the taste test. Hmm? Hmm.
Tell you what. That buckwheat gives it. A little bit of that earthy flavor. Definitely different than your straight white bread. Full of flavor right there with the buckwheat. And now for.
For our friend Judy, who likes butter on her bread. We’re going to put a little butter on there and see how it tastes. Oh, on this warm bread and butter is fantastic. But what a flavor. Remember.
How easy this was to make? It’s a same day rustic, artisan farmer style. I don’t know how to explain it. Gluten free bread. And with that buckwheat in there, you have not only the flavor that we’re adding to this, but it’s.
Also heart healthy. It’s good for cholesterol and sugar levels. It’s high in fiber, potassium, and vitamins. So on top of everything else, it’s so good for you. So here you have it, folks 100% gluten free, artisan style rustic bread.
For all of those of you who are gluten intolerant or like I say, if you know someone who’s gluten intolerant, put them on to this recipe. They’re going to absolutely love it. And don’t forget those other three recipes. I will put links in the description for you for the pizza, focaccia.
And the white bread. Gluten free, of course folks, thanks for tuning in and joining me in the kitchen. The best place to be on today’s episode of cooking with the coaches. And until next time. Bon appetit! Though the crumb is really good,.
Nice and soft. Chewy is perfect. Absolutely perfect.