Learn how to make a delicious gluten-free vegan pizza from scratch with melty vegan cheese in 3 different ways using a gluten-free crust.
Homemade Gluten-Free and Vegan Pizza with Melty Cheese Varieties
Today we are making a Gluten free Plant Based Vegan Pizza from scratch, including vegan cheese that melts in 3 different ways, a gluten free crust, tomato sauce, and toppings. The recipe takes some time and effort, but the end result is well worth it with high-quality ingredients and amazing taste. This version of vegan pizza ensures you won’t feel like you’re missing out on traditional pizza.
The soft melted cheese is made with coconut cream, tapioca starch, garlic powder, onion powder, sea salt, smoked paprika, and turmeric. For sliceable hard cheese, coconut cream, tapioca starch, garlic powder, onion powder, sea salt, smoked paprika, and turmeric are used along with agar agar and cold water. The mozzarella ball cheese includes coconut cream, tapioca starch, garlic powder, onion powder, sea salt, smoked paprika, agar agar, and cold water.
The gluten free pizza crust is made from steamed potatoes, coconut flour, arrowroot starch, and sea salt. The tomato sauce consists of tomato paste, water, sea salt, oregano, basil, garlic powder, and onion powder. Toppings used include crushed garlic, basil leaves, cremini mushrooms, red bell pepper, yellow onion, serrano pepper, and red pepper flakes. This recipe provides a delicious vegan pizza option without compromising on taste or quality.
Mouthwatering Vegan Pizza: Homemade Gluten-Free Crust and Melty Cheese Creations!
Hey everyone welcome back thank you for being so patient we are going to be making this gluten-free vegan pizza from scratch today there is quite a few steps so make sure you check out the notes in the description and yes I will be showing you how to make the cheese the sauce the crust and we will be chopping up all of our veggies that are going to.
Go on the top of the pizza there’s this one that’s like a gooey kind of cheese that you don’t have to melt down it’s kind of already melted but you can just Brown it and that one is the easiest version and then there is the Moss ball cheese so this is the one that kind of looks like mozzarella cheese and then lastly we have our sliceable hard cheese.
And this one melts as well and you can use this one for like a Sherie board cheese and crackers Pizza Etc you get the point so let’s get started on the soft melted cheese first up we are going to add 1 cup of coconut cream to our blender and I’m using Trader Joe’s version and then you’re going to add 2 tbspoon of tapioca starch and then.
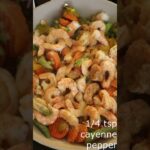
You’re going to add 1 teaspoon of sea salt this onion powder and garlic powder water that I will be adding is optional and I add a half a teaspoon of each of these it just adds a lot of like Umami flavor to it and of course the smoked paprika is necessary I just eyeball this with just a few sprinkles of it and if you want that yellow orange color for a.
Hard cheese type look add a few sprinkles of the turmeric here and you’ll get that desired color next up you’re going to pour this into a pot and you are going to heat this on a medium high you’ll notice that it’ll start to bubble and you’re going to want to continue to stir this I’m using a ceramic pot so you’ll notice it’s not.
Sticking to the bottom of the pan but it’s also thickening up and this is what you want you want to cook this for about 10 minutes and the reason being is because you want to cook off some of that coconut flavor don’t get me wrong we love coconut flavor but not for the cheese so the more you cook it down the more you’ll notice that it doesn’t.
Really have that coconuty aftertaste this is not something that you want to let just sit and boil in your pot for too long you want to make sure your constantly stirring this after you get to this texture you can turn off the heat and as you’ll notice it’ll start to thicken up a little bit more just like this you can literally put this in the.
Fridge in a container and this is the texture that you get after it’s been refrigerated this is me just showing you guys an example on some of the bread that I’ve made and I’m going to heat it up so you can see how it melts yourself I just place this in the oven on a low broiling temperature and look at that it starts Browning like actual cheese does.
Here’s a little cheese pool for you guys in slow motion it’s super hot and addicting so let’s move on to the next cheese the sliceable hard cheese so in order to make this cheese you’re going to follow all the steps of the last cheese that we just made and you’re going to turn that off and then we are going to make an AAR AAR concoction.
Which is basically going to thicken the cheese for us and if you’re not aware agar AAR is basically a seawe that is a thickening agent so first up you’re going to start with one cup of cold water into a pot and you are going to spray sprinkle 3 tbspoon of agar AAR into the pot but do not turn on the heat just yet until you have mixed this.
Thoroughly I’m not sure why the water needs to be cold but it has something to do with how to activate the agar AAR and then you’re going to turn on the heat once it’s been mixed so we will be bringing this to a boil after that you are going to let it simmer for about 5 minutes while you mix it up some people like to just let it simmer without.
Mixing it but I was scared that mine was going to harden because it looked like it was getting really thick as you can see here the texture starts to really thicken up so I started to mix it with my spoon while it’s still really hot we’re going to want to move this mixture into our cheese mixture to make it hard but for a closeup of the texture here is.
What you’re looking for this is what we are going for this is what we want this is what’s going to create that sliceable hard cheese so here we are pouring it into the other mixture you’re going to want to turn the heat back on and start mixing this up until it has been completely mixed together and you guys get the point so I’m going to speed this.
Up to our next step once this is Thoroughly mixed you’ll be able to tell because everything will be Blended in and it won’t look like it’s two separate components and it’ll basically look like what our last cheese looked like while it was at the boiling stage when it was really really hot the only difference is the cool down is going to look very.
Different one thing I do want to note is that since we added a lot of the AAR AAR to this mixture you’re going to want to add a little bit more salt to taste to this if you prefer I actually do I added a little a little bit more to this just because adding the egar AAR can kind of drown out that saltiness which a lot of hard cheese does have so I added about.
Another half a teaspoon but make sure you taste it just be careful because while it is boiling at this level it is extremely hot and you will burn yourself so make sure to let it cool before you try it I added a little bit more smoked paprika to this one for color and a little more of a smokey flavor for the hard cheese that’s optional you can.
Really add whatever you’d like at this time if you want to add slice jalapenos if you want to add some pepper flakes you can really do as you wish at this stage we are about to pour it into a container and then we’re going to let it cool off and then we’ll place it in the fridge after you let it cool off from being extremely boiling hot and then you.
Place it in the fridge it only takes about 30 minutes to actually Harden it hardens really fast so after you’ve covered it and plac it in the fridge for that 30 minutes this is what you’re going to get all I had to do was loosen up the edges and it comes out very firm and perfect perfect now with the firmness of this cheese you could shred.
It if you want to but we’re not going to shred it today we are just going to slice it and this will be the cheese that we are going to use on the pizza in this example on this video but to be honest you can use any of the three cheeses that I show you on here to make the pizza I just decided to use this one because it was easier to cut them and.
Just place them on the crust and here I am just demonstrating to you guys how easy this cheese slices and the different ways that you can use them I cut them them up into these little small squares cuz this is what I’m going to use for the pizza I would actually recommend the shreddable way if you’re going to make it for the pizza it just.
Be a little bit easier and it’ll cook a little bit faster versus the squares but this is what I was using I was really trying to get this video done because this was my second time recording it a few things had went wrong the first time so I was just trying to get it out of the way and so when it comes to storing this cheese it actually stores very well.
I’m sure you can freeze it but I haven’t done that yet um but as you can see here I just put it back into the container with the top and put it back into the fridge and then use it as I please next up we’re going to make the mozzarella ball texture cheese so for this one you’re going to also follow the same steps as you did in the first melted.
Cheese except for the second part while you’re making the agar AAR concoction you’re only going to use two tbspoon of the agar AAR and you’re going to add that to 3/4 cup of cold water and then follow the same steps as you saw me do with the last concoction you’re going to wait until it gets thick and then you’re going to mix it with the cheese from.
There you’re going to want let it cool down until you are able to touch it with your hands and then you are going to make a saltwater bath for your Moss balls sorry somehow this portion did not get recorded basically all you do is get some distilled water and you’re going to add some ice cubes with about a tablespoon or two however salty you like.
It of sea salt from here you’re going to scoop up the cheese as you saw me doing earlier and you are going to drop them into the ice bath you want to leave them for about 10 minutes let them cool off make sure they’re completely cool thoroughly cool all the way through through and then after those 10 minutes I’m just forming them a little bit just.
To make them a little bit more into like the consistency and texture of the actual like mozzarella balls as you’ll see these ones are a little bit extra softer than I would have liked them to be but that’s why I had you guys do two tablespoons instead of teaspoons cuz for this recipe I did exactly teaspoons so that’s just a note if you want this.
Exact texture I would go with two teaspoons if you want it a little bit more harder um and a little bit more rounder I would use two tablespoons now I know these ones are not perfect like some that you’ll see but this was just me experimenting with them and giving you guys some different texture options I just really wanted to get this video.
Out to you guys and I was going to leave this one out but I was like you know what let me just put it in there so they can kind of see how many options you have as far as the different types of textures of cheese that will melt and here I just wanted to give you guys an example of how to slice through the cheese and the texture and what it looks.
Like on the inside as you can see you can even chop it up into smaller pieces p and then put them back in the container for the fridge or if you want to make smaller pieces to put them on the pizza whatever works for you I’m just showing you guys different options and of course this one melts as well all of these cheeses melt and as you can see.
They kind of have a little bit of a stretch pull as well if you just pull them apart and you can even mold them kind of back into little balls and now that we’ve got that done let’s move on to the glutenfree crust the base of this crust is made from steamed potatoes and we’re going to need two cups so I have about four big potatoes that I’m peeling.
The skins from cuz you don’t want the Skins we won’t be using them in this recipe and then I’m going to steam them for about 40 minutes I love this glass steamer that I had got from Amazon I’ll link it below but I have some on here with skins as well and those are for a separate dish for later but the ones on the right are the ones that I’m going to.
Be using for this pizza crust the thing I love about this steamer is that I can just set the time and let it go and then once it’s done it beeps and turns itself off once they were done steaming I let them cool off for just a bit and then I put two cups of them into a large bowl and I started mashing them down with a fork in my case here I let them cool.
Down a little bit too long so they got a little tough but if this happens to you it’s no problem all you have to do is add a little bit of some hot water to it they’ll start to mash much easier next up we are going to add 6 tablespoons of some coconut flour the brand that I’m using is just a simple brand from ry’s it was really reasonably priced I think.
It was like five bucks for this whole bag and make sure to keep a little bit extra on the side because when we roll out the dough we’re going to be placing it on a little bit of coconut flour next up we are going to use some aot starch or aot flour 6 tbspoon of this as well after that we are going to add 1 teaspoon of sea salt and then we are.
Going to start to mash this all together and as you’ll see I added the water the hot water from my Kettle at this point I pretty much just eyeballed it add a little bit at a time if that was the case for you but if you started mashing the potatoes and making this recipe assume soon as they were done steaming you will not need to add any extra hot.
Water so I’m going to speed this up while you see me just mashing it because that’s pretty much all I’m doing for a few minutes really just mashing it together with the fork trying to make sure that there are not any clumps what I love about this recipe is that both of those flowers give it the taste and texture of an actual pizza crust with.
Gluten one thing I will say is we didn’t use any baking powder in this so it doesn’t rise but I should try that next time that just gave me an idea yeah regardless it’s the taste and texture what we’re going for as you can see I kind of used my fist to pound down some of the flour what I do here to make this a little bit easier for me is I grab a.
Bunch of the dough in my hand and I just squeeze it and it all starts to blend together and it forms larger balls of dough which in turn I end up combining all together at the end if you find an easier way to do it that is awesome do whatever works best for you I could have laid this all out on some parchment paper and just kind of like really.
Pressed it down with my hands but this seemed a little bit easier for me and the reason being is because until it’s all uniformly put together it can be very crumbly and I just didn’t want to clean up all the mess and have all the crumbs all on the counter while I’m trying to roll out the pizza so as you can see I continue to Clump it all.
Together with my hand and continue to press it down until it gets into a ball like this this is where it is pretty much ready to lay out on the parchment paper and get to baking and so so this right here is the texture that you want you should be able to push your fingers into the dough and it keep form make sure your oven is preheated to 425 and.
We are going to roll out some parchment paper onto our pizza pan or whatever pan you are using and as I mentioned earlier you are going to use that excess coconut flour to make sure that it doesn’t stick and so that it has a little bit of that grainy texture on the bottom of the pizza crust when it’s done cooking you know how like regular pizzas have that.
So anyways from here you could use a roller pap but to me it’s just a lot easier for me to roll it out with my hands because while it’s in this state it could break a little bit easier and I noticed with my hands I can make it perfectly round and laid out exactly how I want it to so I usually start off in the center and just kind of keep pushing.
It down and as you can see it’ll start to flatten and expand outwardly and that’s where I start to form the edge of the crust by kind of pinching it almost like a pie and I’m going to do that all the way around making nice and uniform and at this point depending on how thick you like your crust you can either leave it like this or expand it a little bit.
More to make more of a thinner crust and that’s pretty much it for that I am now going to get ready to put this in the oven at 425 and I’m going to cook it for 15 minutes and after those 15 minutes we are going to bring it back and this is how it should look you want it to be just browned a little bit and then we are going to flip it over and put it.
Back in the oven I used some parchment paper here to flip it over it made it easier just in case I didn’t want it to break at this stage it could still be really delicate because it hasn’t completely hardened yet and this is just me kind of showing you guys exactly what it should look like because sometimes our ovens work differently so I just.
Want to make sure that you know this is what it should look like because you don’t want your pizza crust to burn after we put the toppings on and next up we are going to prepare our toppings and this is where you can get real creative I made this pizza a few times and so I actually recorded a few variations of some things I used I love fresh garlic.
So I usually Crush some garlic and add it to my toppings but what we’re going to do here is prepare everything and then set it aside for when we are prepared to decorate our pizza and next up we’re going to cut up some mushrooms you can slice them however you’d like I like to just slice mine simply like this they give a great Umami flavor to the.
Pizza and you can use whichever kind of mushrooms you’d like I also really love Chantell mushrooms and oyster mushrooms but I didn’t have any of those on hand so these ones will do I also like a little bit of a kick to my pizza so I am slicing some set on Peppers but jalapenos would be great if you don’t like too much spice and to add a little.
Bit of texture and sweetness I chopped up some bell peppers and some onion and picked a little bit of Basil too off of my little basil plant and now our little toppings plate is all set and ready to go next we’re going to make the sauce so the first step in making this tomato sauce is you’re going to need some tomato paste we will be using 5 to 6.
Tablespoons and mix it with a little bit of water to get this consistency that you see here and then we are going to add a half a teaspoon of dried oregano a few dashes of some smoked paprika I used about four and gave it a little bit of a mix after that and then we are going to add a half a teaspoon of some dried basil leaves after mixing you’ll notice.
That you may need a little bit more water so I’m going to add a little bit more here and then I’m going to mix it up a little bit just to make sure that I have the right texture and consistency that I want for the pizza sauce and then we are going to add a half a teaspoon of some sea salt after we mix that up we are going to add a few dashes of sonion.
Powder and garlic powder when you add some of these spices you will notice that it will start to thicken up a little bit more so I do add a little bit more water here my suggestion would be to add a little bit of water at a time so that it doesn’t get too runny because all of our tomato sauces or spices could react differently and now we are going.
To spread this all on the pizza I spread mine all the way around the pizza except for the edges and you’ll notice that you might have a little bit more of the tomato sauce left over which is totally fine because we might have to add a little bit more later and so after this we are going to want to add our hard cheese I should have shredded the cheese.
But the slices will work totally fine any of the cheeses that I showed you how to make will work on this pizza from here you’re going to put your pizza in the broiler for 3 to 5 minutes and then this should be your end result we’re going to add the toppings and add a little bit of extra sauce to the areas that it might have dried up a little bit.
We add the cheese and the topping separate because the cheese takes a little bit longer to melt and then from here you’re going to place it in the broiler again for another 3 to 5 minutes but really make sure you watch it because it can burn really fast I suggest using the low Broiler setting just in case because I had burnt mine.
The first time I made it and it wasn’t too bad I just don’t want you guys making that same mistake but this is the outcome look at that the Char on the cheese and a little bit of the veggies I added a little bit of some pepper flakes on mine and this is what it looked like after I cut me a slice it’s crazy how you can’t tell that this is a vegan.
Pizza the only difference is a lot of regular pizzas have pepperoni on them and I’m not a huge fan of the fake processed Meats but look at that bend unfortunately I wasn’t able to do a mukbang for you guys for this one but please know I ate this whole thing by myself these pizza recipes that I have been working on have been the first that.
I’ve eaten in 7 years since being vegan you guys know I don’t do a lot of the preservatives or corn Etc so creating this recipe was extremely nostalgic for me and I know you guys will love it too so see you guys on the next video bye