Try this homemade gluten free Olive Garden breadsticks recipe for a delicious and easy-to-make treat. Perfect for those with gluten sensitivities.
Homemade gluten-free Olive Garden breadsticks recipe
These Gluten Free Breadsticks are a delicious and easy-to-make copycat version of Olive Garden’s famous breadsticks. Made with gluten-free flour, psyllium husk powder, and a few other simple ingredients, these breadsticks turn out soft, flavorful, and absolutely delicious. The recipe, created by Mamagourmand, is a must-try for anyone looking for a gluten-free alternative to traditional breadsticks.
The process of making these breadsticks is broken down step by step in the video, from preparing the dough to shaping the batter and adding the delicious topping. With detailed instructions and tips, you’ll be able to recreate these breadsticks at home and enjoy a taste of Olive Garden without ever leaving your kitchen. Whether you follow a gluten-free diet or simply enjoy trying new recipes, these Gluten Free Breadsticks are sure to become a favorite in your household.
DIY Deliciousness: Homemade Gluten-Free Olive Garden Breadsticks!
Welcome to the channel let’s make a gluten-free copycat version of an American Italian restaurant classic glutenfree Olive garded and bread sticks I’m Jamie with Savory saver I share gluten-free recipes tips tricks and resources to make your gluten-free lifestyle easier so please consider hitting subscribe and let’s get started.
A couple things before we get started this recipe comes from the website mama gormand I have not made any of those recipes before so I’m excited to try one today it uses cup for cup gluten-free flour so I’m going to be using that today as well cup for cup uses zanthin Gum as its binder in the blend but we will also be adding some additional.
Pelum husk powder cup for cup also has milk in it as one of the ingredients so if you have any milk issues you will not be able to use this blend but the website does have a dairyfree alternative so definitely check out the website for the full directions there I will include all the ingredients in my description below as well as any hard to.
Find items or items you might not find locally such as the cup for cup the recipe doesn’t look overly difficult we are going to use a stand mixer and we are going to pipe the batter onto the pan so that tells me it’s probably going to be a very sticky batter which we’re all used to right all right let’s get started and see if I can make these or.
Mess them up so for today’s recipe I kind of am doing a little bit of weight a little bit of volume but the ingredient list down below in the description will have both listed so if you miss anything or if you bake one way versus the other so to the bowl of the stand mixer I have 438 G of the cup for cup flour or 3.
Cups to that I want to add 2 tbsp of granulated sugar 2 and 1/2 tpoon or 9 G of instant East 1 tblspoon or 11 G of pelium husk powder a teaspoon of baking powder and a teaspoon of fine salt the recipe does not say this but I’m giving it a quick whisk because I want to make sure everything’s Blended together before I add the wet.
Ingredients now I’ve got my bowl on the stand mixer and at this point it says to add the paddle attachment and to blend everything together I just did that with the Whisk so I’m not going to do that it should be Blended from me whisking it and I actually you know you could have done it with the paddle if you wanted to but I think the Whisk breaks everything.
Up a little bit better now let’s add our wet ingredients you want to add 1 cup of warm water so the water should be about 110° we want to add two eggs at room temperature and I’ve beaten the eggs just to give them a head start in the mixer we’re also going to add A4 of a cup or 53 G of olive oil let’s mix this on low speed for about a.
Minute not like that like this once everything’s been mixed now we want to bump the speed up to medium we want to beat it for 5 minutes and you want to scrape the bowl down halfway through the mix time so let’s get that done and we’ll keep moving forward okay so we’re halfway through the mix it’s been 3 minutes this is a.
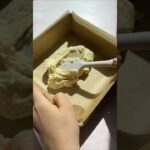
Very loose dough at the moment definitely more of a sticky batter than a bread dough but it does look like it’s mixing really well so we’ll just hope that it shapes well also all right it’s been scraped down let’s beat it for another 2 minutes at medium speed.
Okay it’s been the total 5 minutes now again it is super sticky but I can smell the yeast doing its job so I do like that okay so the description the recipe gives is it should be slightly thick like brownie batter and I think that’s a fair assessment let’s put this to the side for just a moment so I’ve got a large baking sheet that I have.
Lined with parchment paper It also says to spray it with non-stick cooking spray so we’re going to do that as well we should get 12 to 13 bread sticks out of this so if I need another sheet I’ll get one you want them spaced about 2 in apart so I’m not sure how that’s going to go yet so I’ll get another pan if I need.
To okay now we have to get ready to pipe these so the original recipe says to put the batter in a quart size zip top bag that looks a little too big for me to go in a quart size bag or it’s going to be cutting it really close so I’m going to use a gallon size bag I’ve got it over a measuring cup to hold it open for me and I’ve got it wrapped down to make sure.
The batter stays on this side and not on the side I’m trying to pipe it so let’s see how difficult this is all right so that was a little risky cuz it is up over the top of that bag by like 5 in but it’s not spilling all over the place so I think I’m good I definitely think you should go with a bigger bag and this is a two cup.
Measuring cup that seemed to work pretty good let’s pull it up over the top and see if I can still not make a mess there we go yeah I would go with a gallon bag or a half gallon bag I would not go with a two qu size so I’m going to zip this up you are going to need a little air in.
It but I’m going to try to get it all down to a corner first all right let’s scrape this down if you have a metal pastry scrape you’re not going to want to use this side you don’t want to rip the bag I would try using this side that’s what I’m going to do if you have a plastic one this is the time to definitely use the plastic one.
Okay so so far so good I think I am going to get another pan ready just in case so I’m going to get the pan and put the parchment down but not spray it unless I need it let me do that and then we will see how these pipe okay so I’ve got my other pan in the back just in case I need it we want to cut off a corner of the bag and it.
Says to cut off about an inch because they are going to rise in the oven so if you’re going to make a mistake make the hole too small as opposed to too big so let’s do about an inch now you want to pipe these in 6in strips and leave 2 in in between each one to allow them to rise while they bake so let’s see how this.
Goes okay not bad but it’s super sticky and we have to break it off somehow so let me get a bowl of water and we’ll see if that helps all right so I’ve got a bowl of water behind me as well as my kitchen shears so if one doesn’t work we will use the other but I’m going to start with the water and try that method first so let’s keep.
Piping okay the wet fingertip seems to work so just do that or oil your finger down or something so you can break them off okay so I’ve got eight bread sticks on the other pan I’ve got another six seven here so I’ve got 15 they’re not all 6 in they’re off a little bit I’m sure I feel a little bit of batter left in here overall this was much easier.
Than I expected so now we need to bake them and then we need to coat them so I’m going to turn my on to 375° put these in a draft free place so they can rise a little bit before they go in the oven once they go in the oven they’re going to bake for 15 to 17 minutes you want them to be lightly browned with an internal temperature of.
190 to 200° so I will check that to see if that’s where we are while these are baking we’ll make the topping so let me preheat my oven and we’ll get these baked off so our bread sticks are getting ready to go in the oven in a minute or two but I want to melt the butter and make our topping now because I want the.
Butter to have time to infuse with the garlic so I’ve got a tablespoon and a half of butter here I’m going to add about 1/4 teaspoon of garlic powder 1/4 teaspoon of salt and 1/4 teaspoon of Italian seasoning we’re also going to add some Parmesan cheese and today I’m taking the easy way and just going to add the stuff.
Out of the canister but I’m going to wait until just before we brush it on to add that because I don’t want it to get weird in the butter as far as melting or anything so I’m going to pop this in the microwave and melt it it’s probably going to take 20 to 30 seconds okay so it’s all melted down and I’ll just warm it back up if I need to before I use it.
And just before we use it we’ll add a couple tablespoons of grated Parmesan so let’s get those bread sticks in the oven and get them baked all right guys these look really good so let’s temp them and see what they come out to oh yeah 208 we are good let’s check the other pan real quick those are good.
As well so now we need to get them coated so let me do some shifting so we can do that all right so I’ve got my melted butter mixture I’m going to add a couple tablespoons of the jar stuff let’s give it a mix and let’s brush all of these all right guys everything has been coated let me snap a couple pictures and.
We’re going to give these a taste so before we give these a taste you guys did see that they tempt at 200 but first I want to show you this so this is the one I’m going to try it’s a little smaller this one is more golden than this one these are the ones on the top rack and I forgot to rotate the racks so the oven just beeped only because I.
Turned it back on and all of the lighter colored ones I’m popping back in the oven for just a few minutes even though they’re coated just to try to Brown them up so definitely look at rotating those pans because we want some even brownness even if you take out one pan leave the other pan in there for a minute or two to see if you can get those to Brown.
Better because the more golden ones look better but we’re going to try the one that is not as golden because as long as it’s baked through I can work on the looks later all right so let’s break into this bread light consistency from what I can see they look really good they feel.
Soft those are pretty close the texture is super soft I really like the light of that bread the coating on top could be a little stronger for me I want a little bit more salt in there I could actually probably have a little bit more salt in the bread as well I think it was a teaspoon I could.
Probably up it just a little bit maybe or maybe a sprinkle some salt just over the tops of these after I cut them with the butter just to give it a little more salt flavor for me all right let me put this down for a second so let’s talk recipe notes the flour used was cup for cup I actually think they came out great with a cup for.
Cup it does have milk in it as one of the ingredients so you may need to look at other Alternatives if you have a milk allergy and can’t have dairy for whatever reason the process was pretty easy I really didn’t have any problems with it the only thing I did not like about the recipe was it said to put the batter in.
A quart size bag I do think you need at least a half gallon size bag do that or gallon bag it gives you much more space to work with so you’re not as likely to make a mess so take that bag put it around something that it fits put your batter in there and go from there piping wise it piped fairly easy damp finger helped get the batter off of the edge of.
The bag but I really didn’t have any problems with it as far as the size of the bread sticks make them whatever size you want the rest the recipe says 6 in do what works for you if 4 in Works do that if 8 in Works do that don’t worry about the exact six in seasoning I really liked the garlic.
Italian seasoning and parmesan cheese blend but if you like something a little bit different or a little bit spicier by all means change that part up they are best served warm of course gluten-free especially always typically is if you you are reheating these you want to wrap them in a paper towel and then microwave them for 10 to 15 seconds to reheat them.
In the microwave if you’re rewarming them in the oven you want to wrap them in foil at 350° for 5 to 7 minutes to warm them through in the oven leftover bread sticks can be frozen you want to wrap them individually and then store them in a Ziploc bag and keep them for about 3 months in the freezer for thawing those bread sticks you want to.
Thaw them at room temperature for about an hour and then reheat either in the microwave or in the oven all in all very good recipe I will link down below to the full recipe ingredients will be listed in the description below as well as anything that you may need to find that you can’t find in your grocery store guys what do you think of this.
Recipe please leave me your comments below cuz you’re probably not going to Olive Garden anytime soon and if you are you’re you’re not getting these bread sticks there guys I want to thank you so much for watching today I appreciate it and I hope to see you in the next video