This delicious gluten-free shrimp chalupa recipe is sure to ignite a snack obsession! Quick, savory, and bursting with flavor.
Indulge in a Flavorful Twist on a Classic Favorite!
The Homemade Mexican Shrimp Chalupa is a delightful twist on one of Mexico’s most beloved dishes. This version is gluten-free and features baked chalupa shells, making it a scrumptious option for a savory snack or a satisfying meal. The combination of seasoned shrimp and crunchy slaw adds a burst of flavor and texture, perfect for any day of the week.
In addition to the Shrimp and Slaw Chalupa, the recipe collection includes gluten-free bread recipes, which can complement various meals and snacks. This fusion of traditional flavors with a healthier approach makes it an appealing choice for those looking to enjoy Mexican cuisine without gluten.
Indulge in a Flavor Explosion: Your New Guilty Pleasure Awaits!
Are you a fan of this view or this one well while you’re making up your mind let me take a welldeserved bite of my shrimp and saw chalupa Hello creative cooks Welcome back to another episode of the Creative Fi Cooks channel I’m your host Fibian and today I’m diving right into making.
Mexican recipes all month long And first on the list is this shrimp and saw chalupa Chalupa is a popular food in places like Pabla I hope I’m saying that right And Wajaka Mexico And in the US many people think of Taco Bell when they hear the word chalupa My version is gluten-free with baked chalupa shells very very scrump delicious and perfect.
To have as a loaded savory snack any day you like or all week long I have a feeling you’re going to heart this one So let’s get right to it by making the dough In a large mixing bowl combine together all the dry ingredients and whisk very well But since I was making this one for the first time I did things a bit differently by combining the masa.
Flour sum flour and cassava flour first Then season with some fine Himalayan salt Add it in some baking powder to give it a nice rise And whisk everything together I then added in some pumpkin coconut milk I had made prior to filming the recipe Also added in some olive oil to.
Bring it all together But you’ll see after combining everything together at this point I quickly realized that the dough was too crumbly to work with and it would have fallen apart if I tried to form a flattened dough out of this So I mended that by combining some selium husk and milk and let it sit for about a few.
Minutes to thicken Make sure it doesn’t have any clumps because that would make it very hard to incorporate into the dough But in your case you don’t have to do any of that You can just get the full recipe on my website at creatfit.com So you can combine all the dry ingredients first then add in the wet ingredients and go from there After.
A few minutes of the mixture thickening I added in some more milk so that the mixture will turn slurry and workable before adding it to the crumbling dough After adding it to the crumbling dough I combine everything very well I worked it using a wooden spoon to form a dough Then cover the mixing bowl set it aside cover with a clim wrap or a damp kitchen.
Towel and let the dough rest for about 15 minutes before it’s time to roll it out and form some chilles While the dough is resting prepare the shrimps by removing most of the shells but leaving the tail on It also helps you to be able to hold onto something while eating the shrimps during the process of eating your chalupa Then de.
Vain the shrimp by making the slits along the back of the clean shrimp and remove its vein Then set it aside and repeat the cleaning process for the remaining pieces of shrimps If you prefer you can buy pre-cleaned pre-de vained shrimps from the store but I prefer to do this at home At least I know exactly what goes into the cleaning.
Process And actually it doesn’t even take that long I’ll be saving the shrimp shells to make either a stock or to create a shrimp shell powder on a later date which is a fabulous way to reduce food waste while adding flavor to your recipes Do you do this let me know in the comment section below Once you’re done shelling the shrimps.
Wash them Drain off the excess water and set them aside in preparation for seasoning I’m seasoning the shrimps with half a medium sized seedful srano pepper Adding in the seeds will help ensure that it has extra heat And I’m also adding in two thinly sliced garlic cloves And while I’m seasoning the shrimps I’m also.
Preparing more aromatics to make an onion gravy which will include more garlic I mean who doesn’t like garlic in their food trust me we will not judge you Be you Next slice up some srano pepper for more heat If you prefer less heat do as you please so you can enjoy your food and slice up some onions and set them aside The color of the onion.
Doesn’t matter I prefer white or yellow for this recipe Continue seasoning the shrimps with ground coriander powder fine Himalayan salt some ground black pepper some ancho chili powder which is a sweet and smoky pepper very mild in heat very very mild Then add in some high quality Dijon mustard grain and key lime juice Lime juice works well Now.
These limes over here they need to be taken care of So I’ll be juicing them in my next video to make fermented lime juice which will help extend their shelf life Now if you’re interested in seeing that process be sure to give this video a mighty thumbs up Mhm cuz that lets me know that you’re enjoying this video and subscribe so you do not miss the alert.
Once I upload the next video and the videos after that Combine the contents used to season the shrimps very well to help coat the shrimps with the seasoning Then cover the container with a lid Keep it chill in the fridge to marinate until it’s time to cook them Preheat your oven to 375° F to bake your Chalupa shells Now I.
Won’t lie this was quite a tedious process because I was doing it for the first time And since I decided that I did not want to fry my Chalupa shells um that required quite a good amount of thinking but I’m going to make it easier for you And also let me know if you have any questions Be sure to dust your work surface with some massive flour to.
Prevent the dough from sticking Then transfer the dough to the work surface and knead it for about 1 to 2 minutes Then after that cut the slightly formed round dough into about 11 to 12 pieces Then roll each piece of dough into a ball and save the rest in a mixing bowl to make room while working on each piece of dough Working with this dough is so.
Pillowy and satisfying I mean I’m really glad extra glad that the recipe worked out well So be sure to try it out and let me know what you thought about it Now dust your work surface and your rolling pin with some masa flour and roll out each piece of dough into about 5 to 6 in circle If you find that your dough is sticking to the work surface.
Use a bench scraper to gently ease it off of the work surface Or you can use the back of a knife which would be like a kitchen knife like a large chef’s knife and slide it under the flattened dough until it loses contact with the work surface You can do this before or after rolling out the dough But once you’ve.
Rolled it out or before form thick rolls of aluminum foil which you will use to support the flattened dough during the baking process Stick with me here The results are quite worth it Transfer the dough to a parchment line baking sheet and form the flattened dough into a boat by placing thick pieces of the folded foil under the parchment paper on each.
Side of the dough Supporting the flattened dough on each side will form a wavy structure on your baking sheet and will help the dough stay in shape after baking to form small boats known as chalupas in Mexico Repeat this process for the remaining pieces of dough And depending on the size of your baking sheet nestle about.
Three to five pieces of the supported boat shaped dough on the parchment line baking sheet and transfer to the oven to bake for about 30 to 40 minutes until the dough is cooked and lightly golden and well formed Now after transferring some to the oven to bake I continued experimenting and decided to apply a little bit of olive.
Oil on each side of the flattened dough to help it get crisp while baking It did help So I applied a little bit of oil on the previous ones that were baking and continued baking them to perfection You can also turn these to flat bread instead of making chalupas which will help you skip all the dance with a foil support system And if you’re in search.
For more gluten-free flatbread recipes be sure to check out my plantain flatbread red lentil flatbread and cassava flatbread on my channel as well as on my website And guess what they’re all glutenfree Now let me tell you why I did not want to fry these I shared a puffpuff recipe last week which used quite a bit of oil.
To make it And I’m not a fan of oily foods But to serve my curiosity I fried one of the flattened dough and a little bit of oil I should have opted for more oil but oil I really did not want to have a lot of oil in my kitchen I flipped the dough and when it was time to remove it see how much oil it had retained Why should I be drinking oil.
While eating my food after the dough was done frying I laid it to drain on a kitchen tissue laying on the side of a mason jar hoping that it will form into a boat But that was unsuccessful which made me extremely glad that I had opted to bake these instead because take a good look at them They turned out amazing They were made.
With less oil completely glutenfree and maintained their shape during baking with the help of my foil supports So if you’re a fan of foil supports let me know in the comment section below But if not that’s fine too All right time to cook the onion gravy and the shrimps Add some olive oil to a large cast iron skillet In a little bit.
You will see why Then add in the aromatics the onions the srano pepper the garlic Season with some salt and some black pepper Add in some fresh thy sprigs for extra flavor and sauté this combination for about 5 to 7 minutes until the aromatics turn translucent and lightly brown Then move the aromatics to one side of the skillet to make some.
Room on the other half and gently place the marinated shrimps to cook for about 3 minutes on each side These ones are jumbo so they will definitely need extra time Let them cook through Flip them Cook for another 3 minutes If your shrimps are smaller they will not need that much time Add the marinade liquid the shrimps were in to the sauté.
Aromatics and combine well Continue cooking everything on medium heat until they’re done Using a large casting skillet will be in your favor especially during this step so you don’t have to do your cooking in two separate vessels The chalupas are actually considered snacks but you can turn these into a whole meal by preparing the different components.
Well ahead of time like say Saturday prep day or Sunday prep day Which do you prefer once the sauteed aromatics and shrimps are ready remove them from the pan and store them in meal prep containers And all that’s left to do is to assemble your chalupas as you like For me I’m loading each chalupa shell with some klelaw which I had made prior.
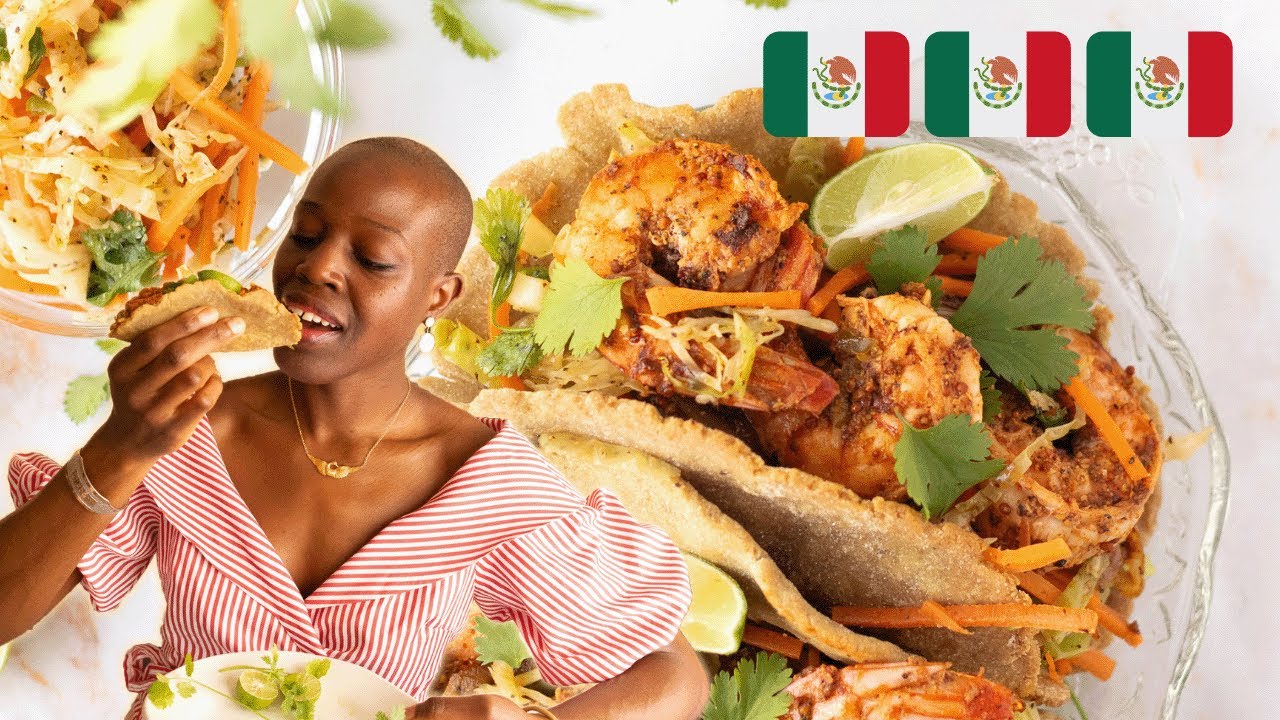
And top with the sauteed aromatics a few shrimps about two to three pieces will do some fresh cilantro leaves and lime wedges to brighten up your meal This one will go very well with ginger juice wju also known as sorrel juice or zubolu Or you know what how about an agua fresca did I say that right now which one will you choose as you can see I’m feasting.
On my chalupa And I’m excited to hear all about how this recipe turned out for you Remember you can get a full recipe on my website by checking out the link in the description box below Thank you as always for watching and we’ll chat again on my next Mexican themed recipe video.
Later Heat