Discover how to make delicious gluten-free, vegan multi-seed bread rolls without dairy or eggs. Perfect for any meal!
Delicious and Nutritious Rolls Perfect for Any Diet!
If you’re looking for a delicious and healthy bread option, consider trying homemade multi-seed rolls that are gluten-free, dairy-free, and vegan. These soft and flavorful rolls are perfect for anyone seeking nutritious alternatives, whether you have dietary restrictions or simply want to enjoy wholesome baked goods. Packed with a variety of seeds, they provide not only great taste but also a wealth of nutrients.
The best part about these rolls is their simplicity in preparation. With no eggs or dairy required, they are easy to make at home, allowing you to enjoy fresh bread without the hassle of complicated recipes. Ideal for a healthy snack or as a complement to your meals, these multi-seed rolls are a versatile addition to your dietary repertoire, catering to a range of preferences and lifestyles.
Wholesome Bites: Crafting Delightfully Nutritious Seed Rolls for Every Palate!
Hi, my name is Sanchari and this is Kitchen Tails Where I try to cook mostly gluten free, dairy free and sugar free foods Today I plan to bake some gluten free and dairy free bread rolls. So let’s get into the making of it. First I will show you how to make the base of the gluten free flour and then we will start to add to it to make the actual bread. I’ve got this bowl on a weighing machine, and I’m going to weigh out 70g of the red rice flour.
You can use brown rice flour instead. Or if you don’t have any of these other types, then you can just use plain white rice flour instead. Then I’m going to put in 70g of white rice flour. So a total of 140. So I have about 160g of potato starch so that’s what I’m going to put in. And then I’m going to need 120g of corn flour.
So this is now the gluten free flour base. So this is what you use for making all your gluten free breads that require, say, all purpose flour. So this is what you would use, and then you would use the other extras like Xanthan gum, oil, egg, whatever to add to it to make the bread. Now to this I’m going to add one teaspoon of salt. So one level teaspoon of salt.
Then I have something called Xanthan gum which helps to keep the gluten free flour together. It acts like a gum. Going to use one level teaspoon of that. Put that in. I then need two level teaspoons of caster sugar. This is so that when we use the yeast, it works well together. And now I put in seven grams of fast action dried yeast.
So I get that in this packet. It’s in the packet, I just put the whole packet in because it’s seven grams. Mix this up well So I’m going to put in about 3 to 4 spoons of mixed seeds. I forgot to mention, I’m making mixed seed bread rolls. So depending on how much you like.
Two teaspoons of olive oil. I don’t know if you can hear, we have Mathilda visiting us today. And she and Ellie are going absolutely nuts. And then one teaspoon of apple cider vinegar that goes in. I’m going to now put the water in. So I have about 325 ml of water that I’m going to now heat in my microwave. So I’ll just heat this and be right back.
I now have heated my water, and I’m going to put in about, 250 ml of it initially. So you don’t want to heat the water too much, lukewarm, basically. Start this at one and you want the consistency of the batter to be like cake batter. So it should fall off the spoon. I might need to use the whole of this, 320 to 325 ml of water. But we’ll see how it is looking. I have a tendency to oil outside as well.
Just in case, the bread rises too far out, and then I can’t take it off. So I just make sure that it’s got a little bit of oil. It’s looking quite good. But like I said, I wanted to have a slightly more cake batter like appearance. So I’m going to add a little bit more water. I’m going to check to see how it’s looking actually.
Let’s see, increase the speed a little. That’s looking pretty good. So I ended up using 324 ml of my water. The batter should basically fall off. The wetter the gluten free dough is, apparently, the better it is, because that way the bread is better. So, I’m going to just take this out. Yeah, I think that looks pretty good.
I don’t know if you can see it. Looks pretty good. So now to put the batter into the muffin trays. So because it’s not, firm enough to hold its shape, so you have to put it into muffin trays or maybe mini loaf trays. I am used to making bread at home. But I’m used to making bread with gluten in it It’s so much easier,.
You don’t have to worry about anything. With gluten free, you need to have all these various types of starches and, you know, different types of flour. And so it’s a bit of an investment. Take a spoon, wet it and shape this. So push it down. You’re going to just snip, score this. So you’re going to just snip it.
Now I’m going to add some more of my seeds on top All right, back to pressing that in. Now to turn on my oven. All right, so my oven is now at temperature of 220°C. I’m going to take my muffin tray, It’s risen a little bit as you can see, I’m going to put that in for about 20 minutes. So put it in, timer.
20 minutes and let’s start it. No, no I don’t want to be kissed. No, no I don’t want to be kissed. We have the little Mathilda visiting us again today, making a lot of noise. So yes, yes No, no I don’t want to be kissed. We’re looking for a brown top.
And when you tap on the bottom, it should sound hollow. So, if the top is not browned enough, I may go a little bit more. So every oven is different. And so it takes, I guess, trial and error to figure out when yours is done. Sometimes they don’t turn brown my gluten free bread, but they do become a little bit harder on the top. And they do sound hollow when you tap at the bottom. So, let’s see how long this takes.
It says 20 minutes in the recipe, but, it may take a little bit longer or it may take a little bit less time. See you in about 20 minutes to half an hour. The top is kind of hardish Sounds hollow We’re going to now let it cool and then once it is cooled, then we’ll do a taste test So now for the taste test.
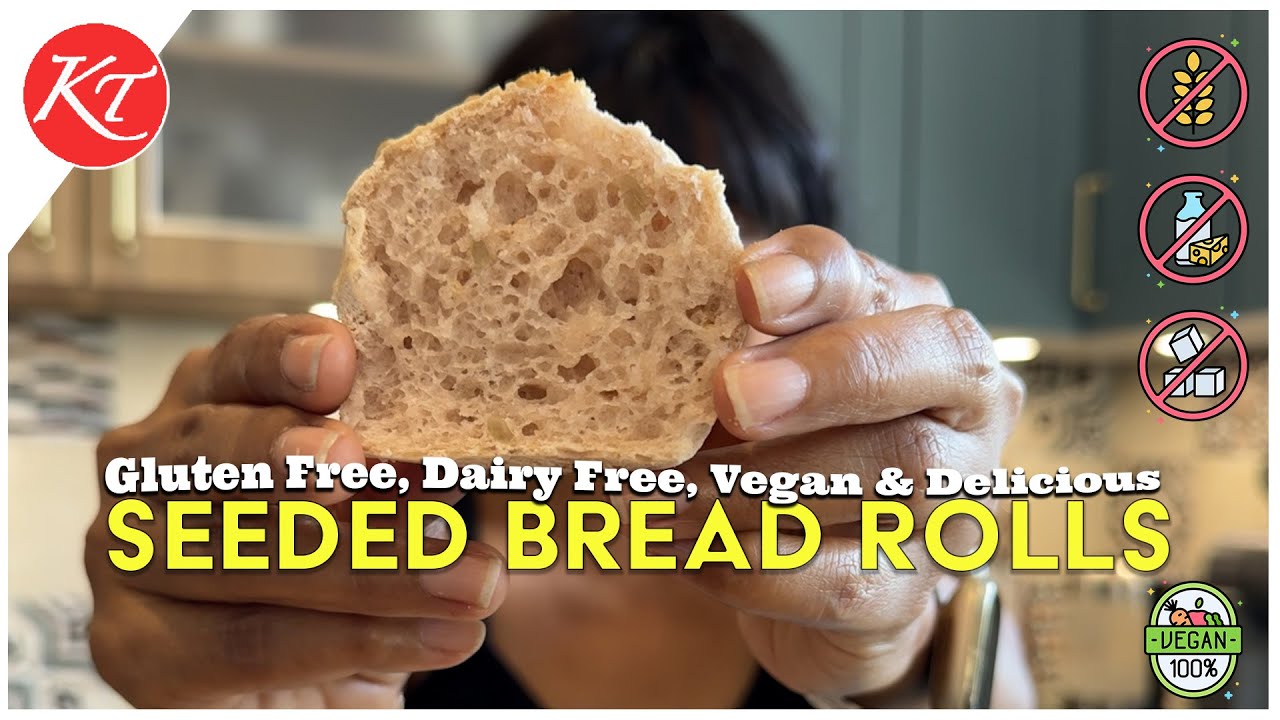
I’m going to take one of these right, let’s cut into it, see how it’s looking. Whoa! It’s crunchy on top It’s still warm. Yeah, that looks like bread. Can you see? That definitely looks like bread. Add a little bit of fig and mustard spread, with some paté.
Here goes. It’s good. My thumb is just up only So I’m really happy with it. It’s just like bread It’s got the holes also that you would need in bread you know, the air pockets. So I’m really, really happy with this consistency. It’s soft inside.
And it’s kind of crunchy on the outside. So it’s really good bread to have. Bread rolls to have. So yeah, that’s my gluten free, dairy free, multi seeded bread rolls. Hope you like it. Hope you make it and I’m sure you’ll enjoy it. Thanks so much for watching, until next time.