2 ingredient keto crunchy taco shells: low carb, keto friendly, nut free, gluten free, sugar free & diabetic friendly. Perfect for a healthy taco night
Easy and Allergen-Free 2-Ingredient Keto Taco Shells
This video is designed to teach everyone how to make 2 ingredient keto crunchy taco shells. These taco shells are low carb, keto friendly, nut free, gluten free, sugar free and diabetic friendly.
Written recipe:
Tips on Kahl and help support the channel:
Buy on Amazon and help support the channel:
8 inch tortilla press:
Golden flax meal:
Rockurwok 10 inch skillet:
#ketotacoshells #ketotortillas #ketorecipes
2 Ingredient Keto Crunchy Taco Shells Recipe (Transcription)
welcome back once again all my lowai friends and for those of you who are here for the first time welcome today I have another very easy keto recipe for you today I am going to show you how to make crunchy keto taco shells now a while ago I showed you how to make some crispy keto high protein taco shells and.
Those are wonderful and I absolutely love the texture of those but today we are going to attempt to do not just a crispy taco shell but an actual crunchy taco shell and if you want a printable version of this recipe you can check out my website at Janet delicious LARP kitchen.com you can find a printable version of this recipe and other goodies.
There for you and if you’re new to the channel and you want to see lots of easy delicious low carb keto recipes make sure you click that subscribe button and click the notification Bell that’s right next to the Subscribe button that way you can be notified every time I put out videos at least every Wednesday and Saturday and if you’d like to help.
Support the channel make make sure you scroll down in the description of the video you’ll see some affiliate links anytime you purchase anything using those affiliate links a small portion of your purchase will go to me and help support the channel so while we do all that let’s get.
Cooking in a large mixing bowl sift together 108 G or around one cup of finely ground flax seed meal make sure that the flax seed meal is fine enough to SI through a mesh strainer you want this really fine so your tortillas have a good texture and so that the seeds can absorb the moisture when we add it I’m using golden flax seed meal cuz I think.
It has a milder taste plus I like the coloring better dark flax seed meal will work just fine also add 160 ml or around 2/3 cup of boiling water it is best to have your water boiling the heat from the boiling water will help to soften your flax seed seed meal that way you have a nice smooth texture if you want to you can add some salt or dry.
Seasonings to give your tortillas a little bit of a flavor I’m just adding about a half teaspoon of salt you don’t have to add that if you don’t want to stir the flax seed meal and the water together for about 2 minutes or until a wet dough forms when you first add the water the mixture is going to be kind of soupy looking but as you continue to.
Stir for those full 2 minutes the seeds are going to absorb the water and the dose is going to start to form it’s going to be a slightly moist dough but it should not be sticky and you should be able to easily shape it after 2 minutes and you have a dough that’s formed scrape down the sides of the bowl and push the dough to the.
Center of the bowl then allow the dough to sit for about 3 minutes this is just going to help absorb any extra moisture that might still be there after 3 minutes divide the dough into four equal portions Place one portion of the dough at a time onto a lined work surface or a tortilla press cover the portion with another piece of parchment paper this.
Will prevent the dough from sticking to your rolling pin or your tortilla press whatever you’re using press or roll the dough out to very thin Circles of your desired size I rolled my tortillas out to around 8 to 9 in circles they’re roughly around 116th of an inch thick give or take a bit the thinner you roll them the quicker and the better they.
Will crisp up preheat a 10in skillet for around 3 to 5 minutes over medium heat or until the skillet is hot if you’re using a skillet other than a cast iron skillet or a non-stick skillet then you’ll need to just very lightly grease the pan with some oil just to make sure that your tortillas don’t stick and I’m using a cast iron skillet so I don’t.
Have to grease mine place your tortillas one at a time into the preheated Skillet cook about 45 minutes to 1 minute or until the tortilla easily releases from your pan turn the tortilla over and cook another 30 seconds or so or until the edges just start beginning to dry a little bit you don’t want to overcook this you want the.
Tortilla to be dry but you still want it to be soft so it can stay flexible once your tortilla is cooked then transfer it to a wire rack and continue to repeat the cooking process until all of the tortillas are cooked and placed on your wire rack allow the tortillas to cool until their room temperature this doesn’t take very long.
Because they’re thin so it should just take a few minutes once they’re cooled preheat your oven to 350° then fold your tortillas one at a time around your taco shell molds I’ll put a link in the description to the taco shell molds that I use then place your molds onto a lined baking sheet if you don’t have any taco shell molds and.
You don’t want to purchase any you can just drape these Loosely over the sides of a 9×5 in loaf pan or cake pan just make sure that the sides of your pan are tall enough so that when you drape your tortilla over the side the bottom of it is not curved you want the sides to be completely straight or when you bake it you’re going to have the ends of your.
Tortilla curved out and then you won’t be able to fit as much filling in it place the tortillas in your preheated oven bake at 350° for 8 to 12 minutes or until the tortillas are crisp if you are using the molds you’ll want to lay the molds on their side when you bake these I baked mine standing up and one of them flopped open while it was baking so I.
Had a very oddly shaped shell and I wasn’t able to put as much filling into it because half of it was folded over once the tortillas are baked remove them from the oven and allow them to cool in the molds or over your pan whichever you’ve used for about 5 minutes so they can continue to crisp up and you don’t burn your fingers after about 5 minutes.
Remove the tortillas from the molds or from the pan whatever you’ve used transfer them to a wire rack and allow them to cool completely before you use them they will continue to crisp up more as they cool the longer you let them sit the more crispy and crunchy they will become you want to make sure that the tortillas are completely cooled and.
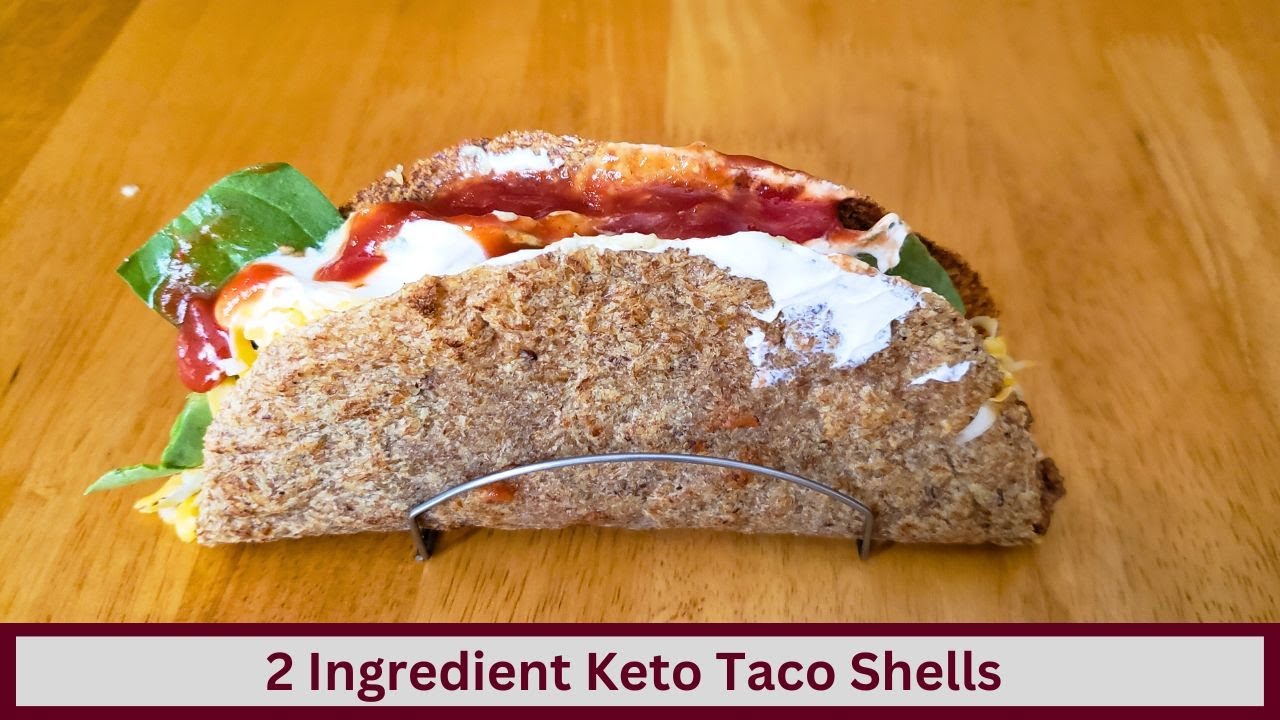
Dried so you can get the ultimate crunch all right guys here we are with my lovely Taco feels nice and sturdy notice none of the filling is falling out or anything now the real question is is does it have a crunch so sh let’s listen mhm yes it does have a.
Crunch mhm M mhm very good has a very good flavor very mild flavor very nice and sturdy I got a bunch of stuff in there and it is holding very very well thumbs up my hands are full but thumbs up very tasty you can fill the tacos and eat these immediately they are best if you use them the day that you make them you.
Can make them up to a day ahead of time and just let them sit and continue to dry overnight on your wire rack but do not store them in a container because they will most likely lose their crispness if they are stored in a container so if you are going to make these you do not want to bake them into a taco shell until you’re ready to use.
Them eat and enjoy and that’s our recipe of the day I hope you enjoyed it if you did and you want to see more videos like this make sure you click that thumbs up like button click that subscribe button leave me a comment if you want to let me know if there’s any recipes that you’d like to learn how to make and I’ll do what I.
Can to get those out there for you and as always keep cooking